Steve
Bedair
Gladewater, Texas
10-2005
Wood Chipper Disc
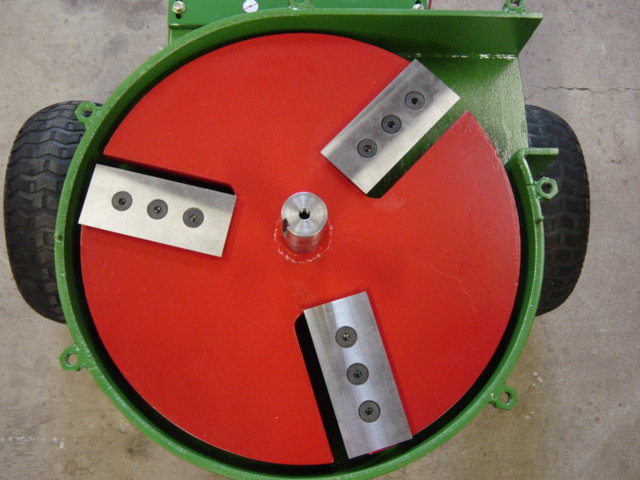
21" OD solid steel chipper disc.
The chipper disc and knives are the heart of the chipper. The disc needs
to be heavy
to to carry a lot of cutting inertia. The disc also has to be balanced
, this is critical.
I didn't skimp on the knives, I bought a set of knives from Zenith
Cutter Co.
The knives I used are double sided 3/8" thick, 7" long x 3" wide knives.
A double sided knife has cutting edges on both sides of the knife.
Once the
knives get dull you can turn them around. The knives I used are part
#
KCH50101. Zenith
Cutter Co. has super customer service and were able
to provide all the blade specifications ( mounting bolt distances)
and answer
all my questions.
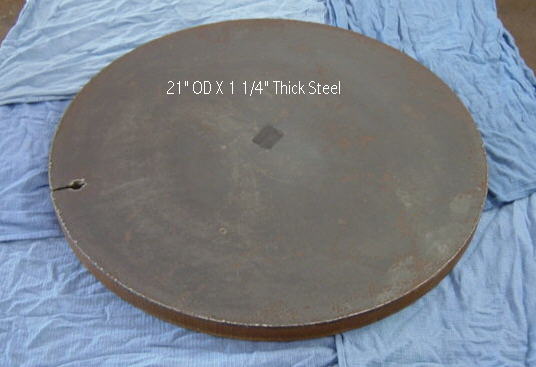
I found this piece of steel at a local metal salvage yard. It appears
to have
been cut with an automated torch. Pretty smooth but not perfect.
Since it was already round it saved a lot of work.
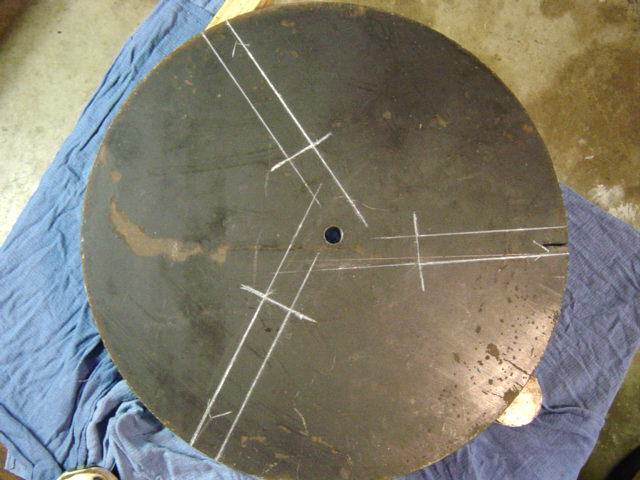
I laid out a triangular pattern for a 3 knife disc. The lines are where
the slots will be cut out.
To lay out a triangle pattern I used my three jaw chuck from my metal
lathe.
I drilled a 1/2" hole in the center of the steel disc and then I chucked
up a piece of
1/2" rod in the chuck. I placed the chuck centered on the wheel and
used a 18"
steel rule to lay out the lines.
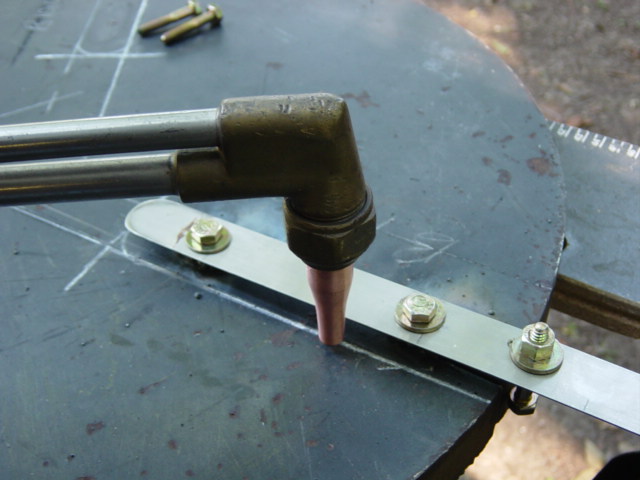
I tack welded some 1/4" nuts to the disc and bolted a cutting guide
(old steel ruler). This will ensure
that all three cuts are identical. For cutting thick steel you need
to have the proper size cutting tip
and use the correct regulator pressures.

Cuts complete and slots are ground using a hand grinder.
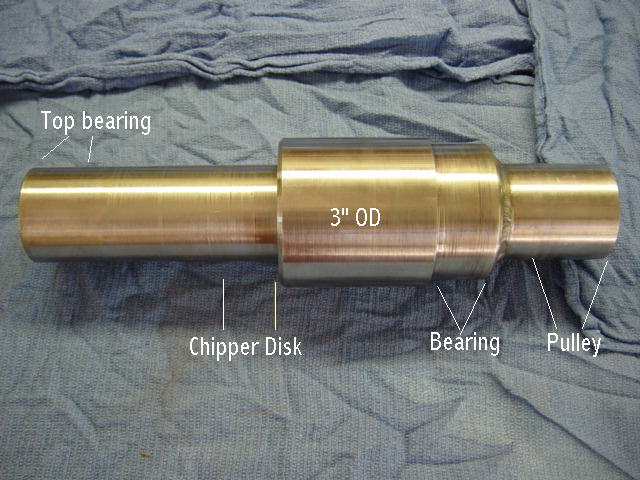
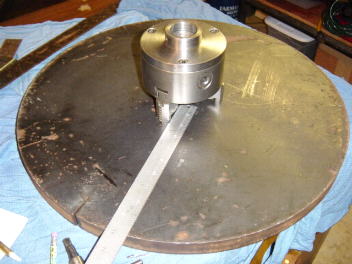
This shaft was turned from a solid piece of 3" stock on my 9 x 20 metal
lathe.
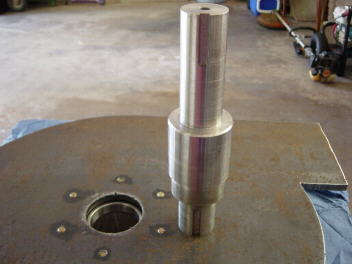
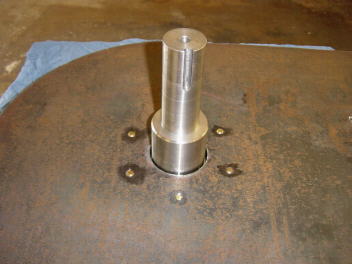
The shaft is sitting on the bottom
plate.
Shaft is installed into the lower bearing.
The 21" disc has a 2" hole and will fit over
the smaller top portion of the shaft. The disc
was then centered and welded to the shaft.
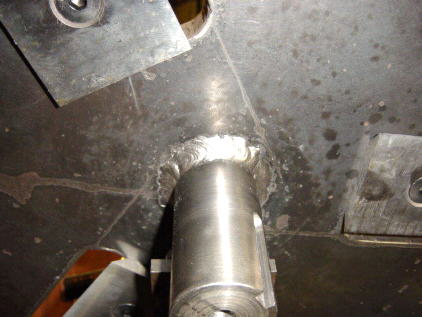
To weld the disc to the shaft I used my 200 amp AC welder ( stick welder
) and 6011 rods for the first two
welding passes. I then used 6013 rods for two more passes. A total
of four beads were made.
Before welding the shaft to the disc I made certain that all the knives
and exhaust blade holes were
correct. I also made sure that the shaft fit all the bearings properly.
Once the shaft is welded to the
disc it's very hard to drill any more holes using a drill press and
it's impossible to do any more
turning in the lathe. ( unless you have a 24" swing on your lathe!)
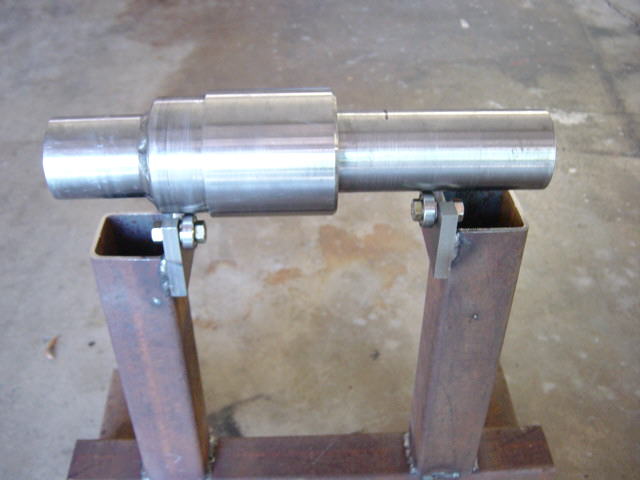
This is how I balanced the 21" chipper disc.
(It was easier to build the balancer prior to welding the shaft to
the disc)
Balancing the disc is super important !!
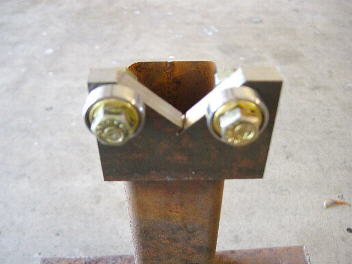
It uses two bearings on each side of the balancer. These are
some old roller skate bearings I got off E Bay.
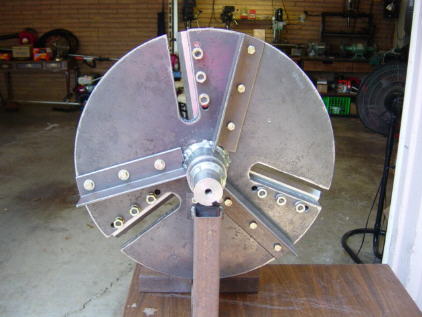
The disc is fully assembled with knives and fan blades ( the fan blades
are are
2"x2" angle iron). The fan blades are attached to the disc with three
grade 8
1/2" bolt. I also used LocTite on the bolts to prevent them from vibrating
out.
I did not want to weld the fan blades to the disc at this point. I
was not sure the 2"
angle iron was going to provide enough air flow. Since using the chipper
the 2"
blades work great!
The balancing jig works very well. If the disc is out of
balance the heavy side will go to the bottom. I used an angle grinder
to remove material from the outer edge of the heavy side. I also used
a small magnet that weighed a few ounces. Once balanced I could place
the
magnet on any part of the disc and it would stop with the magnet at
the bottom
position. So it's very close!
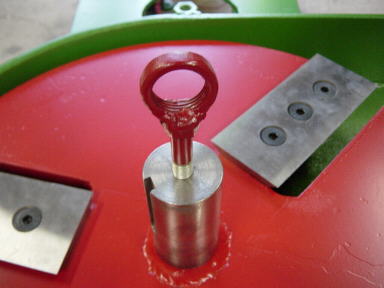
I have an electric hoist in my shop so I made a lifting eye
that really helps in assembly / disassembly.
I've included pictures of the building process.
Just click on the links below.
If you are considering building a wood chipper please read the disclaimer
here
Comments / Questions /
Suggestions or Add Your Link
This information is provided for personal use only.
Copyright 2002 /2005 Steve
Bedair