9 x 20 Compound Clamp
Getting Started page1
The plans shown here are by no means the best
but have worked
well for me. This clamp can be built entirely
on the 9 x 20 lathe.
Please note that these are the measurements
that worked for my Harbor Freight 9 x 20 lathe.
All the 9 x 20's are basically
the same but exact measurements may differ.
Please also note that the construction of a new
compound clamp plate
needs to be a minimum of 1/2" thick steel ( 5/8"
thick would be even better)
This is to ensure that there is enough material
to provide a snug fit
to the existing neck of the compound to the new
hole in the clamping plate.
This extra material at the neck is what provides
the support,
not just the 4 attaching bolts.
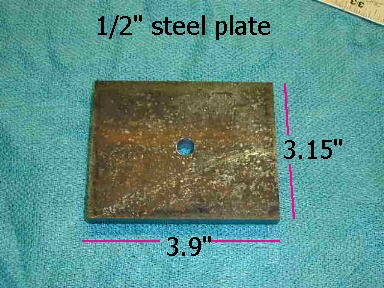
I started with a piece of 1/2" thick steel plate
( 5/8" would even be better).
I cut this to size with my metal cutting bandsaw.
I next drilled a 3/8" hole in the center of the
plate.
( Note: Some have went with a larger 4" x 4"
clamp dimension )
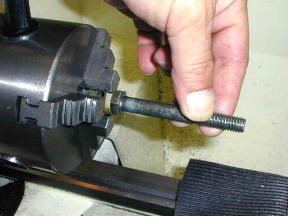
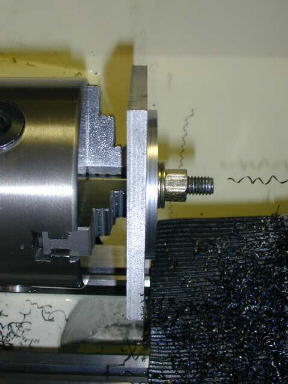
A 3/8" x 3" long bolt can be tightened in
the chuck with the head of the 3/8" bolt pulled against the
rear jaws of the chuck. This allows a nut to
be tightened "tight" without the bolt moving / slipping.
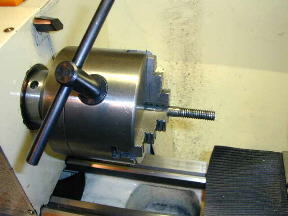
With the 1/2" steel plate attached to the 3/8" bolt I create a shoulder
as shown above.
This will be the top of the clamp. The shoulder will allow the steel
plate to be held
in the chuck to complete the bottom side of the clamp.
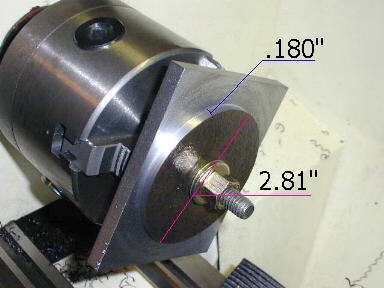
A side view

Once the shoulder is completed the steel plate is removed from the
chuck and turned around.
You will have to change out the chuck jaws and use the shoulder to
grip the steel plate as shown.