.
Marc Micllef's
9 x 20 Speed Control
Steve,
I think I've come up with the ultimate
speed control. I haven't seen anything else like it so I wanted to
share it with you. I've had this project in the works since I last
talked with you a couple of years ago. Since then I moved and all
projects were set on the back burner. I finally have gotten my shop
up and running and have been able to start getting some things done.
Among these was to finish the DC conversion of my 9x20, inspired by your
work. I started watching for a controller and motor on Ebay.
I ended up with a KB Electronics KBCC-125 bundled with a 1.5hp treadmill
motor for something like $60. I wasn't very impressed with the motor.
I'm assuming the 1.5hp rating was instantaneous peak HP with the armature
locked and not actually sustainable. I would think it's actual rating
is probably closer to 1/2 horse continuous, but probably adequate for the
9x20. The real gem in the package was the KB speed controller.
It was very well built and flexible, although it didn't support plug reversing
or braking. When reading the manual, I did notice that a -R version
was available which supported both reversing and braking. Wish I
had known, I'd have picked one of them up instead. Well as things
worked out. I ended up using this setup on my Bridgeport M-head mill that
I finally brought home from work. It was 3 phase but I didn't have
it at home. So instead of getting a phase converter, I ended up converting
it to DC with the treadmill motor and KB controller. A
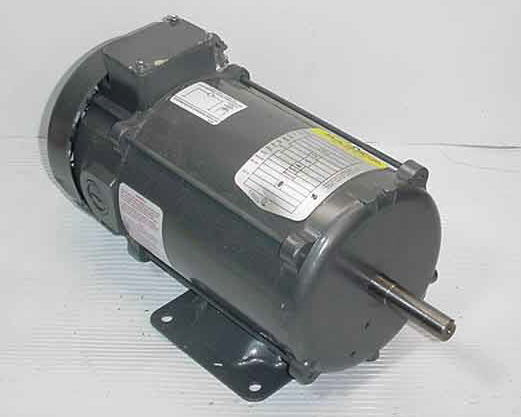
few months later, I ran across a really nice 2hp 90vdc Baldor Industrial
motor on Fleabay that I stole for $25 + $25 shipping. It was Identical
to this one but without the mounting base.
.
Shortly thereafter, I came across a
KBCC-125-R controller. I didn't get. this one so cheap, I think I
paid $100 for it
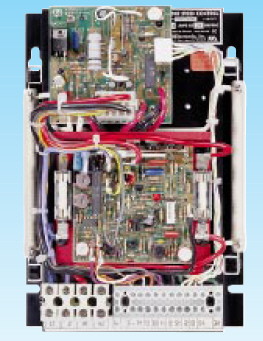
It's rated for 1.5hp max, but I didn't
really expect that to be much of an issue with the 9x20. One of the
great features of this controller, besides the ability to plug reverse,
was it had accomodations for a jog circuit. I realize that a lot
of controllers have a jog function, but the KB implementation is special
(I think?). After studying the various control configurations offered
in the KB manual, I figured out a way to design a jog circuit with completely
independent speed and direction controls. This is what I came up
with:
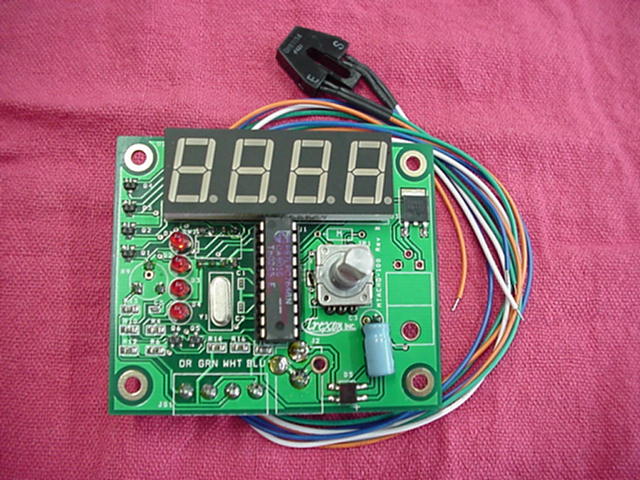
I went to www.mkctools.com/tachulator.htm
where I was able to purchase the bare Tachulator board without a case for
just a little bit more than the tach from the Little Machine Shop.
It has a resolution of 1 rpm, and can read as slow as 3 rpm's if a 16 pitch
target is used. If a simple single pitch target is used, it's minimum
reading is 50 rpm. It uses an IR transmitter/receiver in a reflective
mode rather than the interrupted mode of the LMS tach so a different approach
was needed. The tach manual comes with a couple of targets that you
can use. They are simple black & white radial targets, like a
pie, designed to be glued on the end of a shaft. Because the drive
pulley isn't flat, there was just no good place to stick one of these targets.
I was also concerned that over time oil and crud would end up being flung
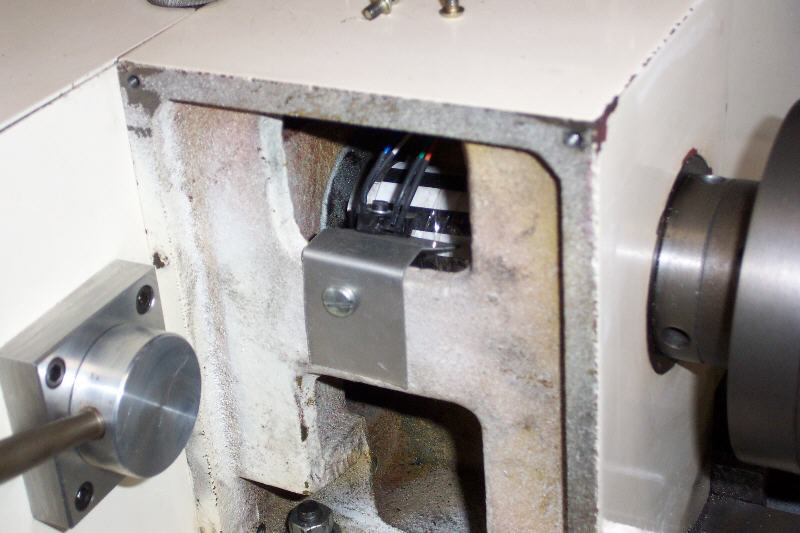
on it interferring with the readings. I found the perfect solution
was to create a new target consisting of alternating black and white bands
that could be wrapped around the spindle shaft and taped inside the 'headstock'
between the bearings where it would be shielded from oil, dirt, and debris.
It also keeps it out of direct light which could interfere with it's reading.
A simple sheet aluminum bracket was good enough to support the sensor.
 I
produced the target using Autocad, having measured the diameter of the
spindle then calculating the circumference to get the length correct.I
wanted to use the original lower pulley assy. off the stock motor to retain
the ability to change belt ratios. Unfortunately, the shaft on the
Baldor motor is larger than the stock motor. Because I wanted to
be able to put the stock drive back in at any time, I didn't want to bore
out the original pulley. So once again, I derived inspiration from
your work and hacked out a new gear just to drive the xl belt.
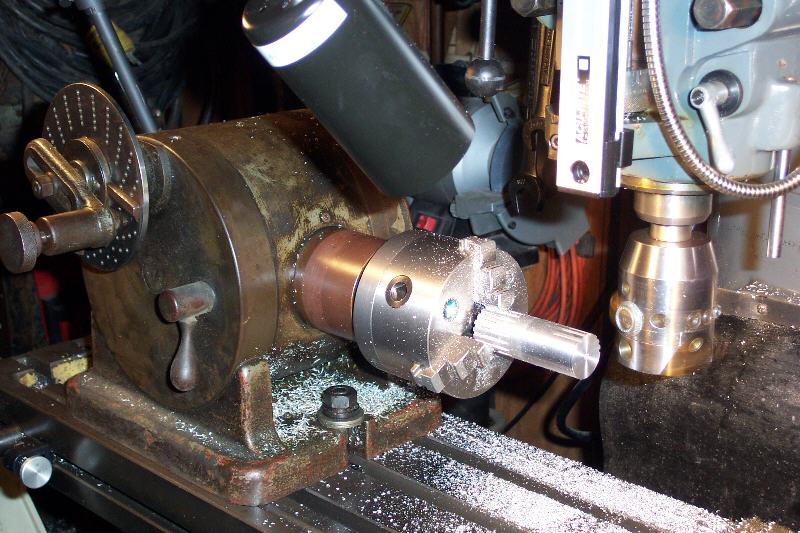 I
don't remember what went wrong with the first attempt. I think maybe
I cut the teeth a touch too deep which screwed up the profile. In
any event, the second time worked out and I ended up with this.
I
don't remember what went wrong with the first attempt. I think maybe
I cut the teeth a touch too deep which screwed up the profile. In
any event, the second time worked out and I ended up with this.
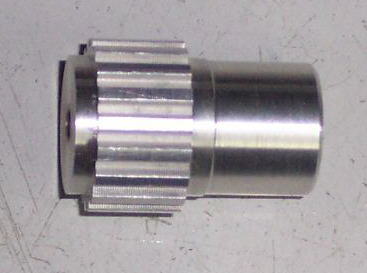
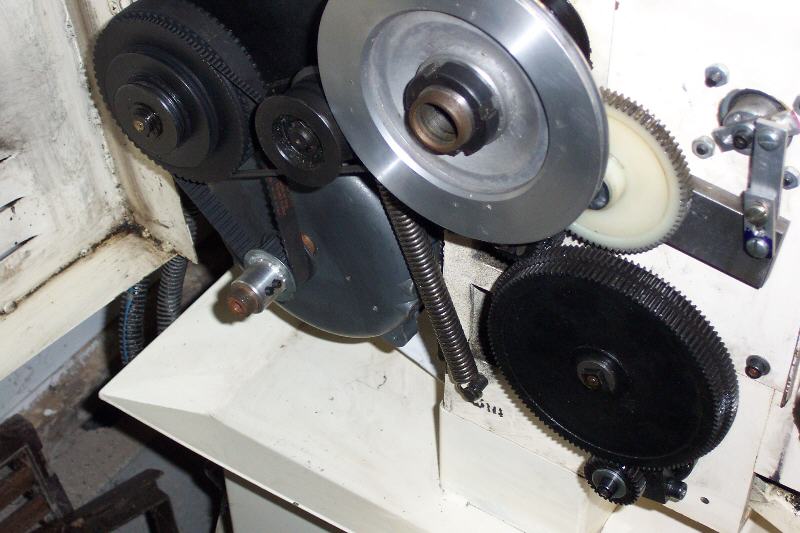
This is only a temporary solution.
Eventually I want to order an original replacement pulley to bore and fit
it to my motor for the other 3 ratios. But for now, this is working
fine:
 I
mounted the speed controller inside the cabinet to keep it free from oil
and swarf:
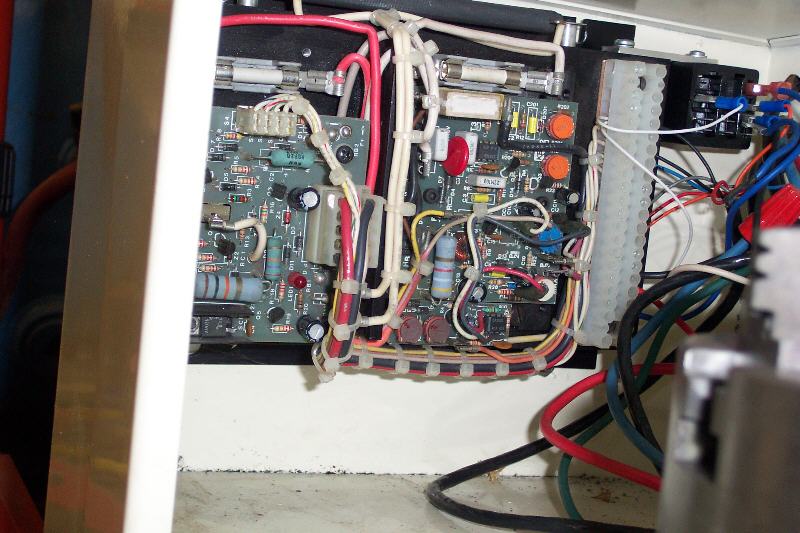 The
relay attached by the terminal block switches the main power, which is
remotely controlled via the operating panel:
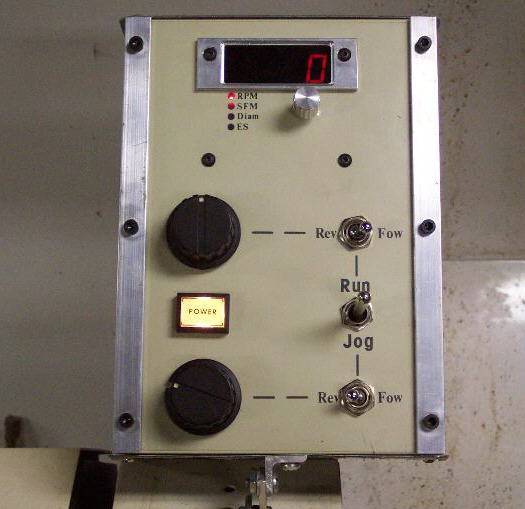
The Run/Jog switch is a DPDT center
off with an extended handle. It was originally momentary in both
directions, but I was able to disassemble the switch and remove one of
the return springs so it stays in the run position but retains the momentary
action for Jog. The power switch is an Allen Bradley push button
switch with a 24 volt indicator bulb. I used two 2.2k / 5watt resistors
in series to get 4.4k to drop the 120vac down enough to power the bulb
without a transformer. The box is a project box I picked up at Radio
Scrap along with the 2 speed control knobs. I made both the bezel
and the knob for the Tachulator. The lettering is all done with dry
transfer sheets. To protect it I overlayed the entire panel with
a piece of mylar sheet I had in stock. The 2 aluminum strips down
the sides hold down and protect the edges of the mylar sheet.My current
speed range is about 12 rpm on the low side using the lowest speed pulley,
and around 1600 rpm on the high side using the highest speed pulley using
relatively conservative settings on the speed controller. Once I
replace the gear on the motor with an original pulley, the top speed will
be significantly higher, exceeding the stock 2000 rpm, though I wouldn't
operate it at those speeds for any length of time due to the greased spindle
bearings. With the standard 3 jaw chuck, the dynamic brake stops
the chuck in about 2 seconds. It is perfectly acceptable to switch
to reverse at any time. It will apply the brake and stop the spindle
before it reverses direction. This setup is perfect for cutting metric
threads when you can't open the half-nut. I have the Run speed set
really slow forward for cutting the threads, and Jog set for reverse at
high speed. At the end of the cut I can back out the compound and
hit Jog to quickly reverse back to the beginning, then start my next pass
at the same dead slow speed every time. Of course It is critical
that any chuck used has a very positive lock on the spindle to avoid having
the chuck spun off under the heavy braking or acceleration this controller
can provde. This is probably
the last of the modifications I'll be making to this lathe. I'm going
to pick up a Monarch 10ee in the next few weeks to take it's place.
It's just too limited in size and rigidity for a lot of the work I have.
I'll still keep the 9x20 around, mainly to be able to cut metric threads.I
see that you are a gun enthusist. Here's my latest project:
Took it to the range the other day
and ran about a hundred rounds through it without a hitch. The shells
all looked good with no signs of deformity, head seperation, cracking or
unseated primers. Having passed the test fire stage, it's on to the
final cleanup and finish work. This thing is a blast, but a bit expensive
to feed! Once again, thanks
for all the great info and inspiration you've provided. If it weren't
for your site, there's a good chance I would never have done this conversion.
As always, feel free to post any of these pictures or text you'd like on
your website to share with all the other 9x20 owners. If you have
any questions or answers, feel free to drop me a e-mail.All the best,
Marc Micllef
Comments / Questions / Suggestions or Add Your Link
This information is provided for personal use only
Copyright 2006 Steve Bedair